K8s 单机版
k8s 单机版
| 系统 | 配置 | 硬盘 |
|---|---|---|
| centos 7.8 | 16C32GB | 200GB |
部署
1. 关闭swap分区
swapoff -a && sysctl -w vm.swappiness=0
sed -ri '/^[^#]*swap/s@^@#@' /etc/fstab
2. 设置limit
# vim /etc/security/limits.conf

* soft nofile 655360
* hard nofile 131072
* soft nproc 655350
* hard nproc 655350
* soft memlock unlimited
* hard memlock unlimited
3. 内核配置
cat > /etc/sysctl.d/kubernetes.conf <<EOF
#将桥接的IPv4流量传递到iptables 的链
net.bridge.bridge-nf-call-ip6tables = 1
net.bridge.bridge-nf-call-iptables = 1
EOF
sysctl --system # 生效
4. containerd 安装
cat <<EOF | sudo tee /etc/modules-load.d/k8s.conf
overlay
br_netfilter
EOF

sudo modprobe overlay
sudo modprobe br_netfilter

# 设置所需的 sysctl 参数,参数在重新启动后保持不变
cat <<EOF | sudo tee /etc/sysctl.d/k8s.conf
net.bridge.bridge-nf-call-iptables  = 1
net.bridge.bridge-nf-call-ip6tables = 1
net.ipv4.ip_forward                 = 1
EOF

# 应用 sysctl 参数而不重新启动
sudo sysctl --system
#安装containerd
yum remove docker \
                  docker-client \
                  docker-client-latest \
                  docker-common \
                  docker-latest \
                  docker-latest-logrotate \
                  docker-logrotate \
                  docker-engine

yum install -y yum-utils
yum-config-manager \
>     --add-repo \
>     https://download.docker.com/linux/centos/docker-ce.repo
yum install -y containerd.io
containerd config default > /etc/containerd/config.toml
systemctl restart containerd

#vim /etc/containerd/config.toml  修改镜像
sandbox_image = "registry.aliyuncs.com/google_containers/pause:3.6"
systemctl daemon-reload
5. 安装crictl
https://github.com/kubernetes-sigs/cri-tools/releases
6.kubectl
https://kubernetes.io/zh-cn/docs/tasks/tools/install-kubectl-linux/#install-kubectl-binary-with-curl-on-linux
#安装 v1.24.0 版本的kubectl
curl -LO https://dl.k8s.io/release/v1.24.0/bin/linux/amd64/kubectl
mv kubectl  /usr/sbin/kubectl
7. kubeadm
# 官方源,需要科学上网
cat <<EOF | sudo tee /etc/yum.repos.d/kubernetes.repo
[kubernetes]
name=Kubernetes
baseurl=https://packages.cloud.google.com/yum/repos/kubernetes-el7-\$basearch
enabled=1
gpgcheck=1
repo_gpgcheck=1
gpgkey=https://packages.cloud.google.com/yum/doc/yum-key.gpg https://packages.cloud.google.com/yum/doc/rpm-package-key.gpg
exclude=kubelet kubeadm kubectl
EOF

# 将 SELinux 设置为 permissive 模式(相当于将其禁用)
sudo setenforce 0
sudo yum install -y kubelet kubeadm kubectl --disableexcludes=kubernetes
sudo systemctl enable --now kubelet

#改为阿里的源方便
cat <<EOF > /etc/yum.repos.d/kubernetes.repo
[kubernetes]
name=Kubernetes
baseurl=http://mirrors.aliyun.com/kubernetes/yum/repos/kubernetes-el7-x86_64
enabled=1
gpgcheck=0
repo_gpgcheck=0
gpgkey=http://mirrors.aliyun.com/kubernetes/yum/doc/yum-key.gpg
        http://mirrors.aliyun.com/kubernetes/yum/doc/rpm-package-key.gpg
EOF
初始化集群
参考官网https://kubernetes.io/zh-cn/docs/reference/setup-tools/kubeadm/
kubeadm init \
--kubernetes-version=v1.24.0 \
--pod-network-cidr=10.244.0.0/16 \
--apiserver-advertise-address=172.19.0.31 \
--image-repository registry.aliyuncs.com/google_containers
输出信息如下
Your Kubernetes control-plane has initialized successfully!

To start using your cluster, you need to run the following as a regular user:

  mkdir -p $HOME/.kube
  sudo cp -i /etc/kubernetes/admin.conf $HOME/.kube/config
  sudo chown $(id -u):$(id -g) $HOME/.kube/config

Alternatively, if you are the root user, you can run:

  export KUBECONFIG=/etc/kubernetes/admin.conf

You should now deploy a pod network to the cluster.
Run "kubectl apply -f [podnetwork].yaml" with one of the options listed at:
  https://kubernetes.io/docs/concepts/cluster-administration/addons/

Then you can join any number of worker nodes by running the following on each as root:

kubeadm join 172.19.0.31:6443 --token ojukna.dqkl862f0ajj7z9p \
        --discovery-token-ca-cert-hash sha256:8e02fa1e48ec71c683411b4cb24a9ef50b6f156fdfde055be98293e6adee1487
9. 去除污点
在mster 节点上部署Pod的话,需要删除node 的污点
kubectl taint nodes --all node-role.kubernetes.io/master-
kubectl taint nodes --all node-role.kubernetes.io/control-plane- node-role.kubernetes.io/master-
kubectl  describe node 节点名字 |grep Taints
10. 安装flannel
参考地址 https://github.com/flannel-io/flannel/blob/master/Documentation/kubernetes.md
kubectl apply -f https://raw.githubusercontent.com/flannel-io/flannel/master/Documentation/kube-flannel.yml

11. 故障解决
crictl images ls
WARN[0000] image connect using default endpoints: [unix:///var/run/dockershim.sock unix:///run/containerd/containerd.sock unix:///run/crio/crio.sock unix:///var/run/cri-dockerd.sock]. As the default settings are now deprecated, you should set the endpoint instead.
ERRO[0000] unable to determine image API version: rpc error: code = Unavailable desc = connection error: desc = "transport: Error while dialing dial unix /var/run/dockershim.sock: connect: no such file or directory"
#解决
vim /etc/crictl.yaml
runtime-endpoint: unix:///run/containerd/containerd.sock
image-endpoint: unix:///run/containerd/containerd.sock
timeout: 10
debug: false

#systemctl restart containerd
coredns HTTP probe failed with statuscode: 503
是因为防火墙原因导致
systemctl stop firewalld
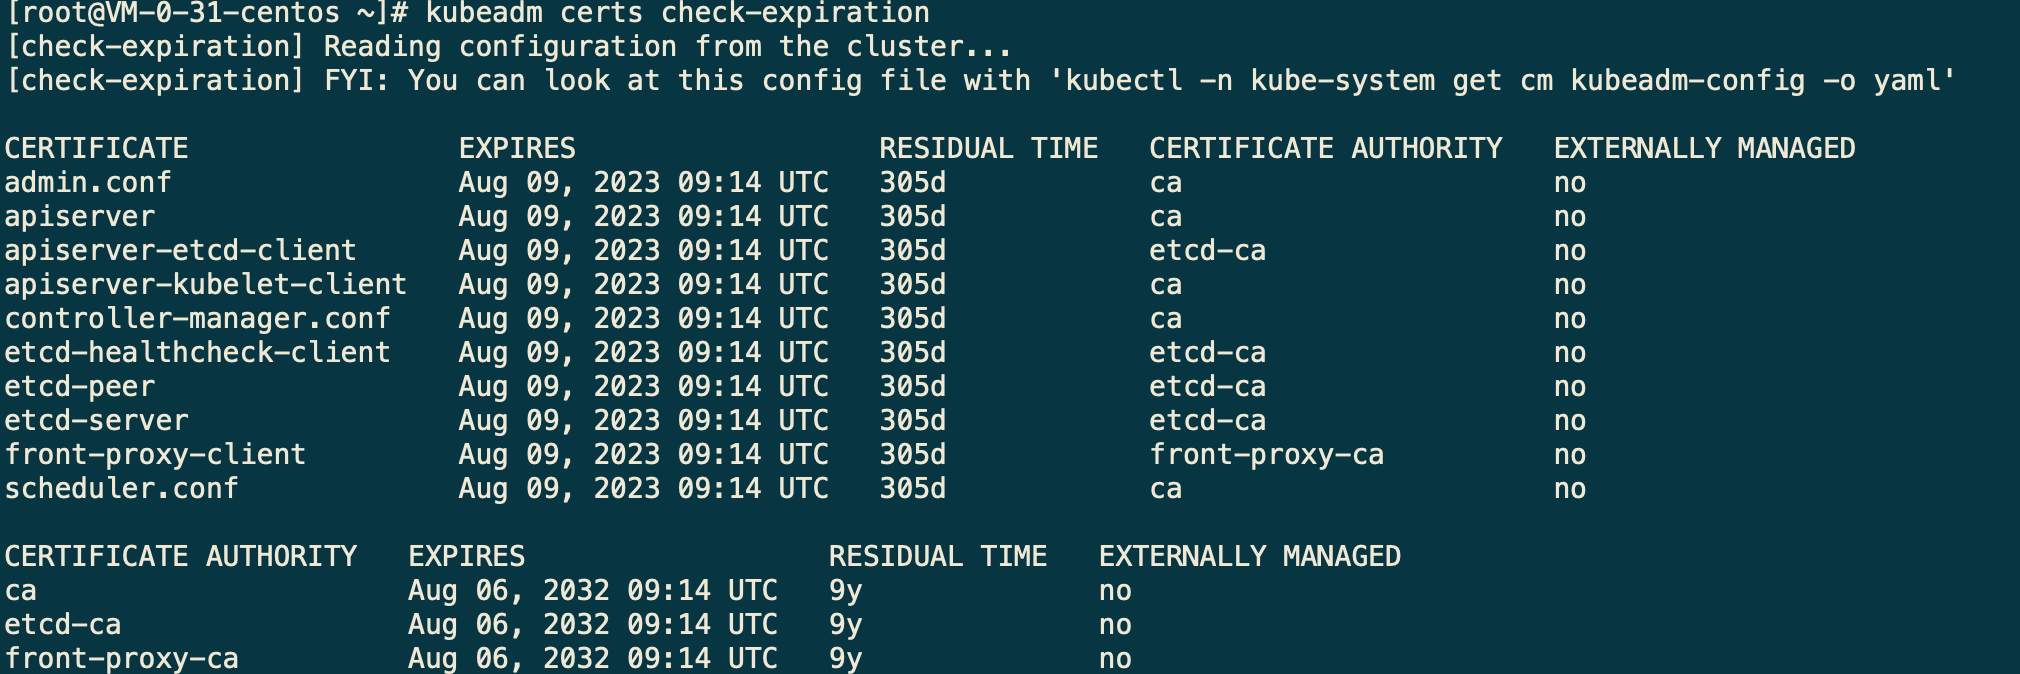
12 证书有效期
# 查看证书有效期
kubeadm certs check-expiration

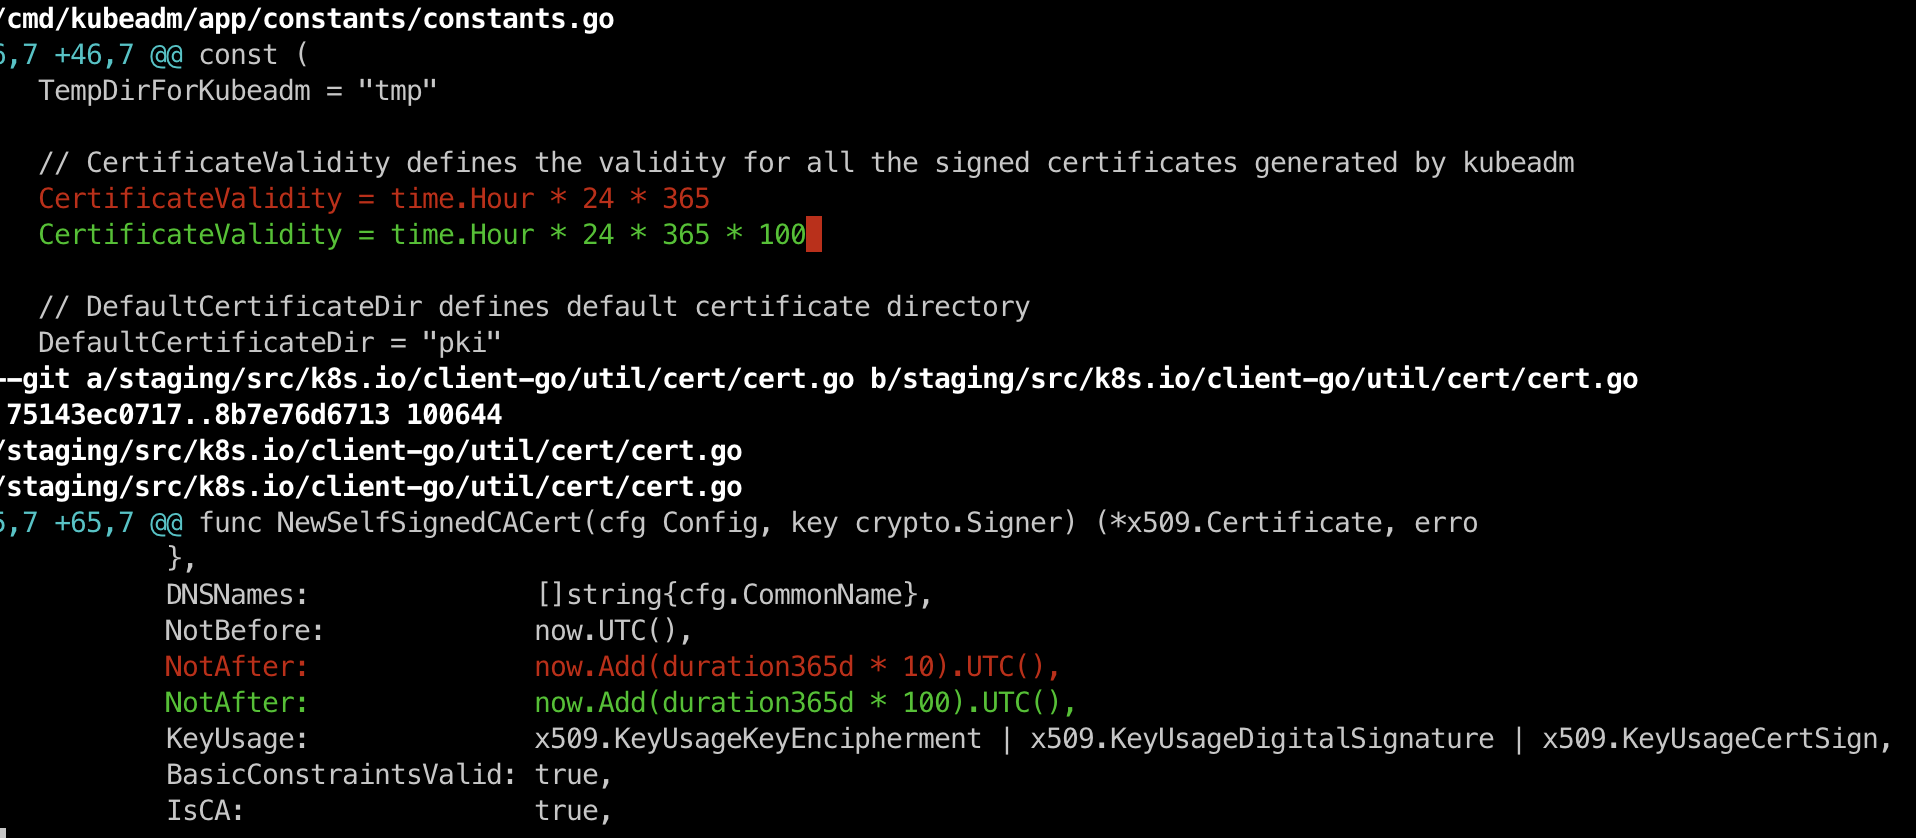
更改证书到100年
下载源码修改改100年
vim cmd/kubeadm/app/constants/constants.go
vim staging/src/k8s.io/client-go/util/cert/cert.go

#编译 kubeadm
# 最好是在linux 环境中编译
KUBE_BUILD_PLATFORMS=linux/amd64  make all WHAT=cmd/kubeadm    GOFLAGS=-v
#编译 kubelet
KUBE_BUILD_PLATFORMS=linux/amd64   make all WHAT=cmd/kubelet    GOFLAGS=-v
#编译 kubectl
KUBE_BUILD_PLATFORMS=linux/amd64  make all WHAT=cmd/kubectl    GOFLAGS=-v

#所有组件都编译
KUBE_BUILD_PLATFORMS=linux/amd64 make all GOFLAGS=-v GOGCFLAGS="-N -l"
查看证书到期时间
# 证书到期时间查看
kubeadm certs check-expiration
#重置所有证书
 kubeadm  certs renew all

#更新kubeconfig 文件
kubeadm init phase kubeconfig all
mv $HOME/.kube/config $HOME/.kube/config.old
cp -i /etc/kubernetes/admin.conf $HOME/.kube/config
chown $(id -u):$(id -g) $HOME/.kube/config